-
NUCLEO-F334R8 and 4 relay shield from Seeed Studio


NUCLEO Page
Home Page

This example show how to use NUCLEO-F334R8 and 4 relay shield from Seeed Studio.

Plug on the NUCLEO-F334R8 the 4 relay shield from Seeed Studio, see below.
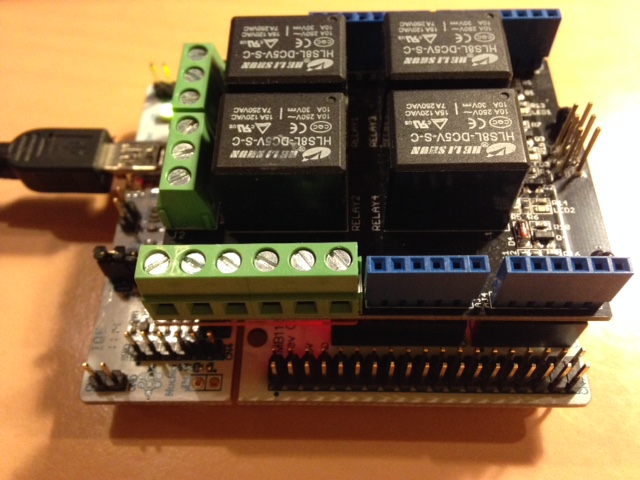


Press the BLUE button and you must see the 4 relays go on for 2 second in sequence.


The SW is available for mBed and is here.
The listing is below.
#include "mbed.h"
 
/*
 By www.emcu.it
 
  Test the: 4 relay shield from seeed studio
  http://www.seeedstudio.com/wiki/Relay_Shield_V2.0 
 
 *
 * Permission is hereby granted, free of charge, to any person obtaining a copy
 * of this software and associated documentation files (the "Software"), to deal
 * in the Software without restriction, including without limitation the rights
 * to use, copy, modify, merge, publish, distribute, sublicense, and/or sell
 * copies of the Software, and to permit persons to whom the Software is
 * furnished to do so, subject to the following conditions:
 *
 * The above copyright notice and this permission notice shall be included in
 * all copies or substantial portions of the Software.
 *
 * THE SOFTWARE IS PROVIDED "AS IS", WITHOUT WARRANTY OF ANY KIND, EXPRESS OR
 * IMPLIED, INCLUDING BUT NOT LIMITED TO THE WARRANTIES OF MERCHANTABILITY,
 * FITNESS FOR A PARTICULAR PURPOSE AND NONINFRINGEMENT. IN NO EVENT SHALL THE
 * AUTHORS OR COPYRIGHT HOLDERS BE LIABLE FOR ANY CLAIM, DAMAGES OR OTHER
 * LIABILITY, WHETHER IN AN ACTION OF CONTRACT, TORT OR OTHERWISE, ARISING FROM,
 * OUT OF OR IN CONNECTION WITH THE SOFTWARE OR THE USE OR OTHER DEALINGS IN
 * THE SOFTWARE.
 *
*/
 
 
// NOTE: The Serial pc & Serial device are not used in this example
Serial pc(SERIAL_TX, SERIAL_RX);    // This is USART2 tx, rx - It is used for debug (Usb Virtual Com)
Serial device(PB_6, PA_10);         // This is USART1 tx, rx
//------------------------------------
// UART configuration:
// 9600 bauds, 8-bit data, no parity
//------------------------------------
 
 
DigitalIn mybutton(USER_BUTTON);
DigitalOut LED(PA_5);      
DigitalOut RL1(PA_8);       // Relè n.1
DigitalOut RL2(PB_10);      // Relè n.2
DigitalOut RL3(PB_4);       // Relè n.3
DigitalOut RL4(PB_5);       // Relè n.4
 
#define NonPremuto 1
#define Premuto    0
 
void OnRELE_forTime(int Rele, float Tempo);
 
int main() 
{
  while(1
  {
    if (mybutton == Premuto) 
    {   // Button is pressed
        LED = !LED;             // Toggle the LED state
        OnRELE_forTime(12);   // ON RL1 for 2sec
        OnRELE_forTime(22);   // ON RL2 for 2sec
        OnRELE_forTime(32);   // ON RL3 for 2sec
        OnRELE_forTime(42);   // ON RL4 for 2sec
    }
  }
}
 
 
void OnRELE_forTime(int Rele, float Tempo)
{
    if (Rele == 1)
    {
        RL1 = 1;
        wait(Tempo);
        RL1 = 0;
    }
    
    if (Rele == 2)
    {
        RL2 = 1;
        wait(Tempo);
        RL2 = 0;
    }    
    
    if (Rele == 3)
    {
        RL3 = 1;
        wait(Tempo);
        RL3 = 0;
    }    
    
    if (Rele == 4)
    {
        RL4 = 1;
        wait(Tempo);
        RL4 = 0;
    }   


UP


Home Page