How to install the new driver for ST-Link-v2 and
STM8 software for test the configuration
STM8 software for test the configuration

Home
Page
STM8 Page
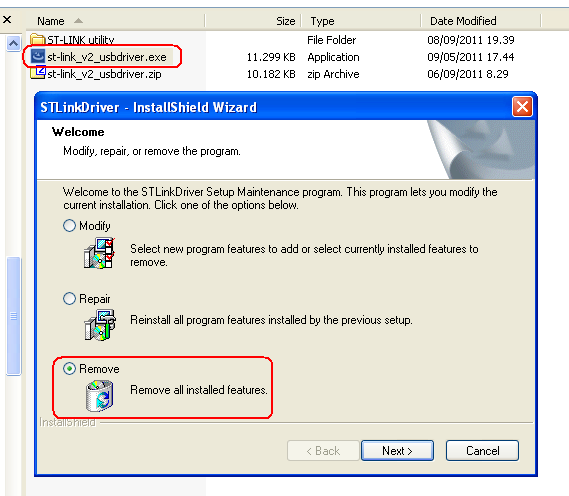
If on your PC you have a old ST-Link driver, at the first time select:
REMOVE
for remove the old driver (see below):
3)
STM8 Page
Some customers finds some problems using the new ST-LINK-v2 and STVD/STVP.
This problems are born from the installation of the software for ST-LINK-v2 and STVD/STVP that are not correct.
For solve this problems follow the explanation below.
ATTENTION: do the steps below by the permission of the ADMINISTRATOR on your PC.
1)
2)
This problems are born from the installation of the software for ST-LINK-v2 and STVD/STVP that are not correct.
For solve this problems follow the explanation below.
ATTENTION: do the steps below by the permission of the ADMINISTRATOR on your PC.
1)
Remove the STVD and STVP.
Download and install the last version of STVD and STVP, for do this see my explanations; see here:
Download and install the last version of STVD and STVP, for do this see my explanations; see here:
2)
Install the new driver for ST-Link-v2, for do this go here:
and download and install:
If on your PC you have a old ST-Link driver, at the first time select:
REMOVE
for remove the old driver (see below):
Now run again
st-link_v2_usbdriver.exe
for installing the new ST-Link-v2 driver.
At this point you have the new STVD and the new STVP that working properly with ST-Link-v2.
Now DownLoad and install the ST-LINK-v2 firmware upgrade that is here.
Afther the download unzip the file and run the ST-LinkUpgrade.exe for upgrade the FW on your ST-LINK-v2
See below steps n.1, 2 and 3.
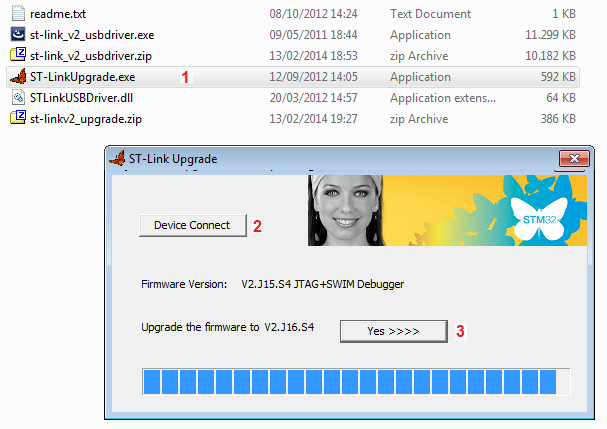
At the end you must see the image below.
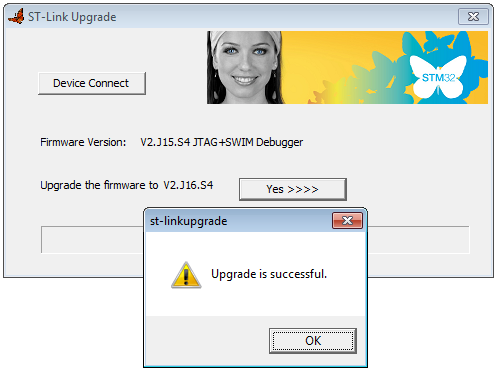
Now exit from ST-LINK Upgrade and go to step 3 (see below).
At this point you have the new STVD and the new STVP that working properly with ST-Link-v2.
Now DownLoad and install the ST-LINK-v2 firmware upgrade that is here.
Afther the download unzip the file and run the ST-LinkUpgrade.exe for upgrade the FW on your ST-LINK-v2
See below steps n.1, 2 and 3.
At the end you must see the image below.
Now exit from ST-LINK Upgrade and go to step 3 (see below).
3)
For testing your installation
download the example STM8-Test-STLinkV2
that is for COSMIC
C Compiler 32K free and run it on STM8/128-EVAL.
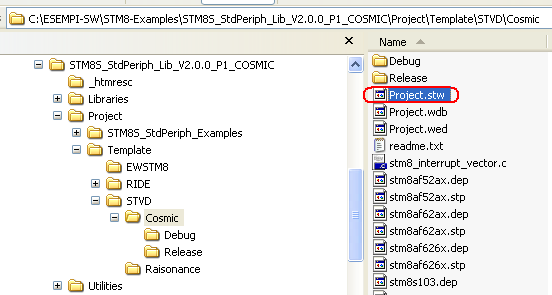
For run the project you must enter in the:
For run the project you must enter in the:
c:\........\Template\STVD\COSMIC
and run:
Project.stw
see below.
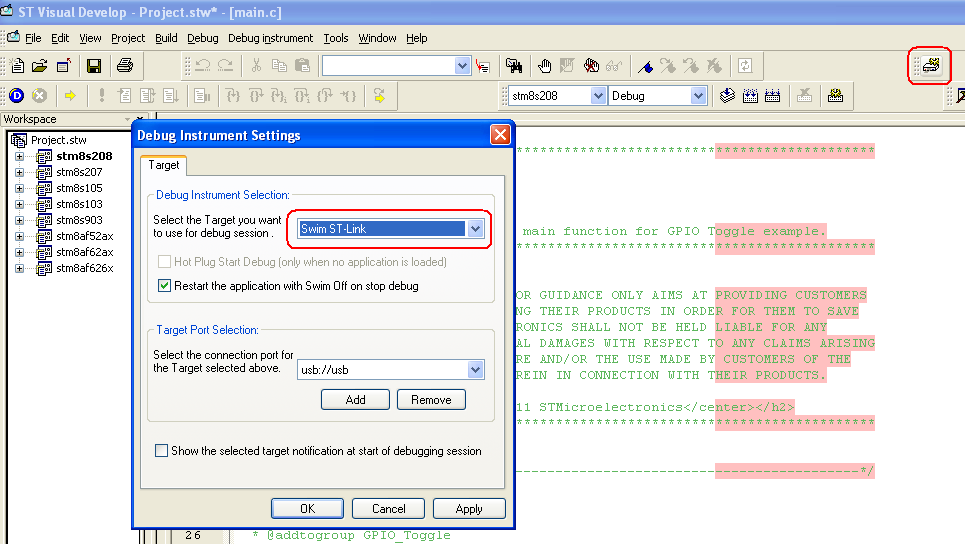
Now press the Icon Target Settings and configure the new window that appear as below.
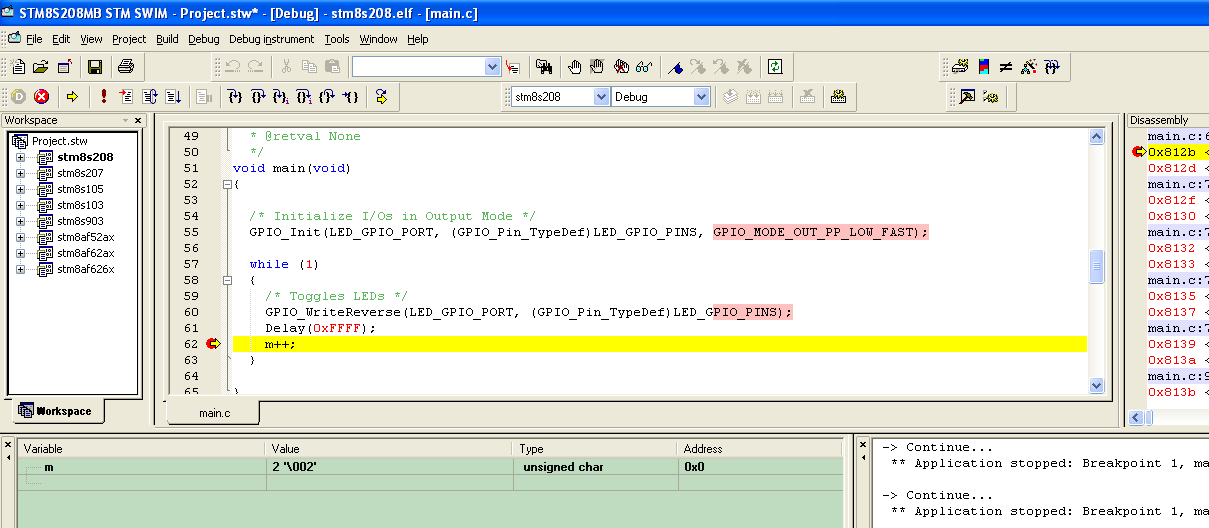
Now press Icon Debug and next Icon Run
  and you must see something like below.
If you press the Icon Continue you must see increase the variable m and the STM8/128-EVAL LEDs must go ON and OFF, see below.
Now press the Icon Target Settings and configure the new window that appear as below.
Now press Icon Debug
and next Icon Run and you must see something like below.If you press the Icon Continue
you must see increase the variable m and the STM8/128-EVAL LEDs must go ON and OFF, see below.