exe1
explain how to use Atollic, I/O, Interrupt, TIM3, TIM4, MEMS used for mouse emulation, USB, etc.

STM32F4xx Page
STM32 Page
SILICA ITALY STDay 2011
STM32F4-Discovery exe1 explain how to use Atollic, I/O, Interrupt, TIM3, TIM4, MEMS used for mouse emulation, USB, etc.
- Hand's On
- Software example
- Extensive presentation concerning this example
- Library Manual is here, download it, unzip it and double click on:

- Clock configuration tool for STM32F40x/41x is here
- Documentation concernig STM32F4-Discovery is here
- Extensive presentation concerning this example is here
- Extensive presentation concerning this example in RUSSIAN language is here

- We suppose that the example is in the:
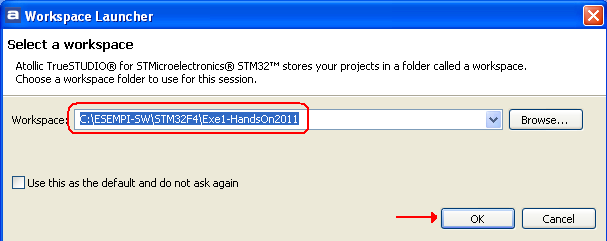
C:\ESEMPI-SW\STM32F4\Exe1-HandsOn2011 - Run ATOLLIC v.2.2 or higher
- From the ATOLLIC Workspace Launcher in the box Workspace select:
- From the new page that appears click on: Start using TrueSTUDIO

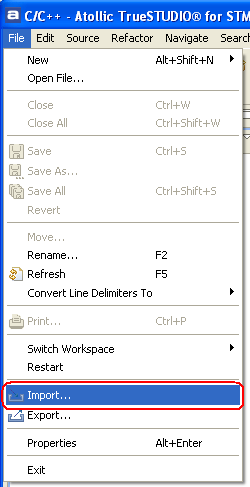
- Now we are inside the ATOLLIC IDE. From File menu select Import
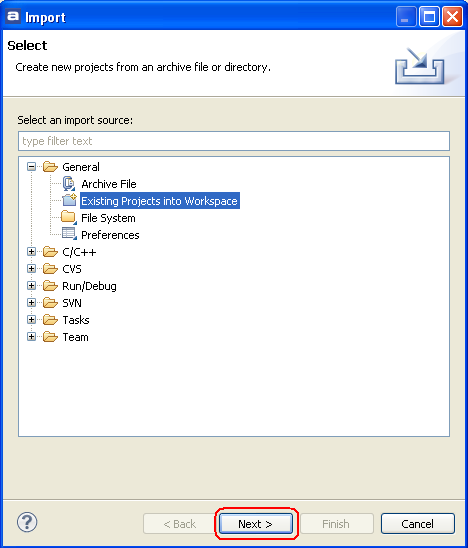
- From the Import box select:
General->Existing Projects into Workspace
and press Next
- From the new page that appears choose:
Select archive file
Click on Browse button and select the file Ex1_-_Demo_on_STM32F4-Discovery_-_solution_v2.zip
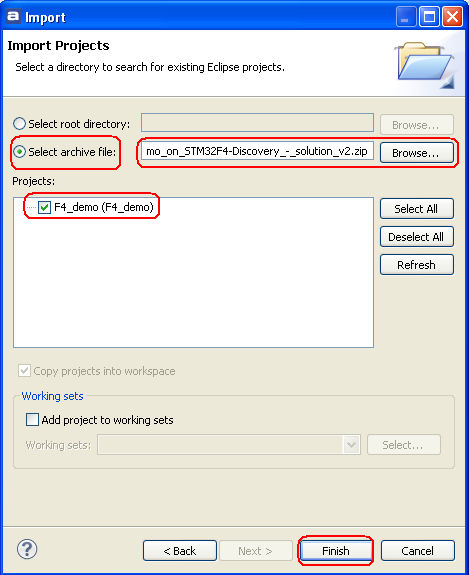
Now press Finish button.
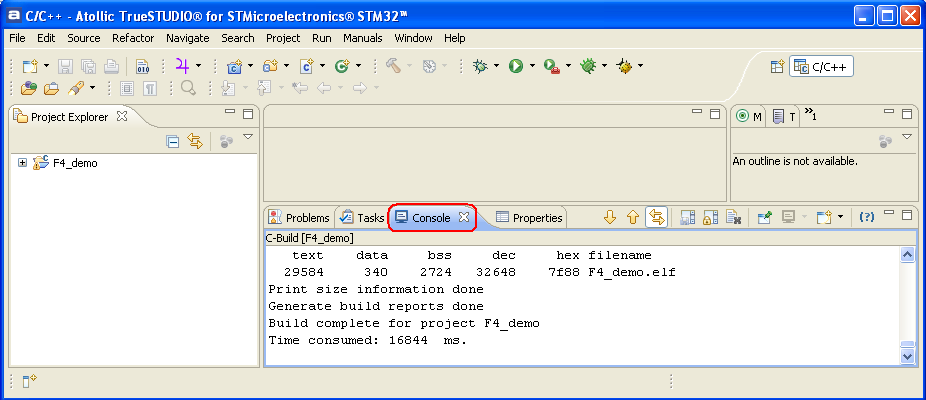
- Now the ATOLLIC import, inside the workspace, the project and compile it.
Press on the Console button and you must see something similar to image below
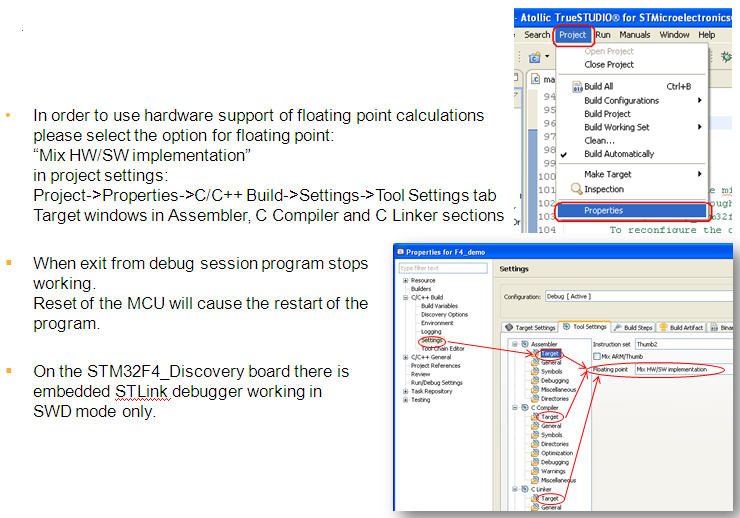
- For use FPU see below
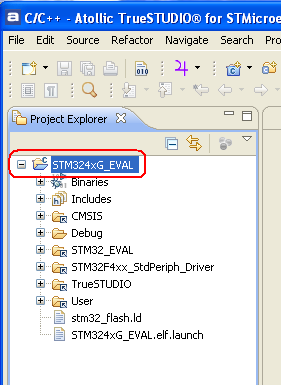
- Now is necessary configure the Debugger, for do this make sure to have select your project (see below)
- next select the Debug Configurations (see below)
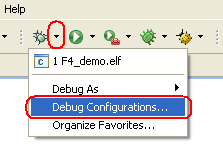
and from the new windows that appears chose F4_demo.elf (see below) and from the Debugger tab make sure that are selected:
ST-LINK, Autostart local GDB server and SWD interface (see below).
If all is OK press Close button but if you do some modifications before to exit press Apply Button and next Close button.

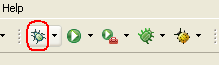
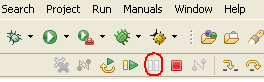
- For start the Debug press the Debug icon, see below
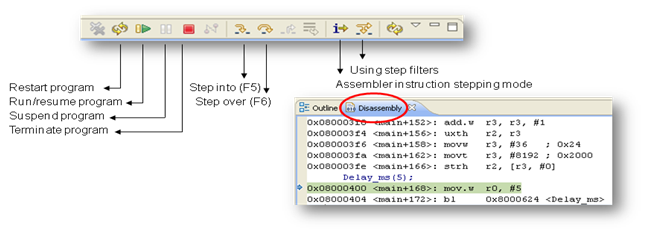
- Main Debug commands
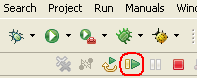
- RUN or RESUME icon, see below
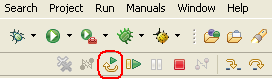
- Restart Program icon, see below
-
PAUSE icon, see below
-
END Debug icon, see below

-
ADD/REMOVE breakpoint double click on line number
-
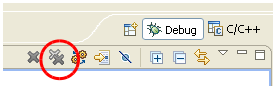
Remove ALL breakpoint icon, see below
-
To add variables to be watched -> drag&drop its name to Expressions tab or right click mouse on variable and select “Add watch expression”, see below
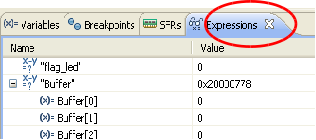
-
All necessary information concerning the registers of the peripherals is available (reset state, address, current value, bits value and the description), see below.
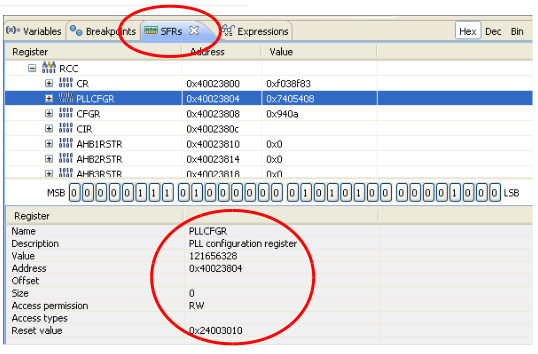
-
It is possible to track changes in core registers -> Registers tab (any change is reported by yellow highlight), see below.
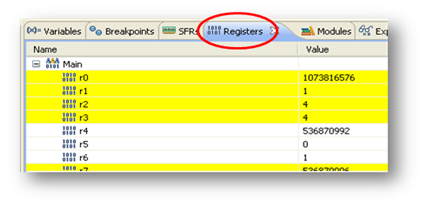
-
Debug Bar is below
- RUN or RESUME icon, see below
- The Ex1_-_Demo_on_STM32F4-Discovery_-_solution_v2.zip does this
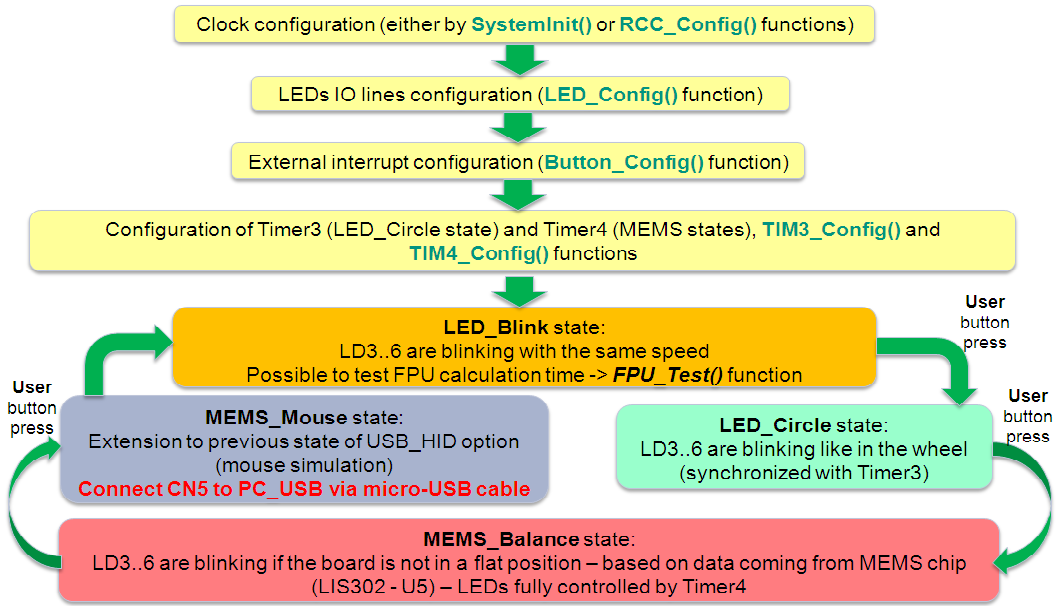
To switch from one functionality to another press the BLUE button that is present on the STM32F4-Discovery.
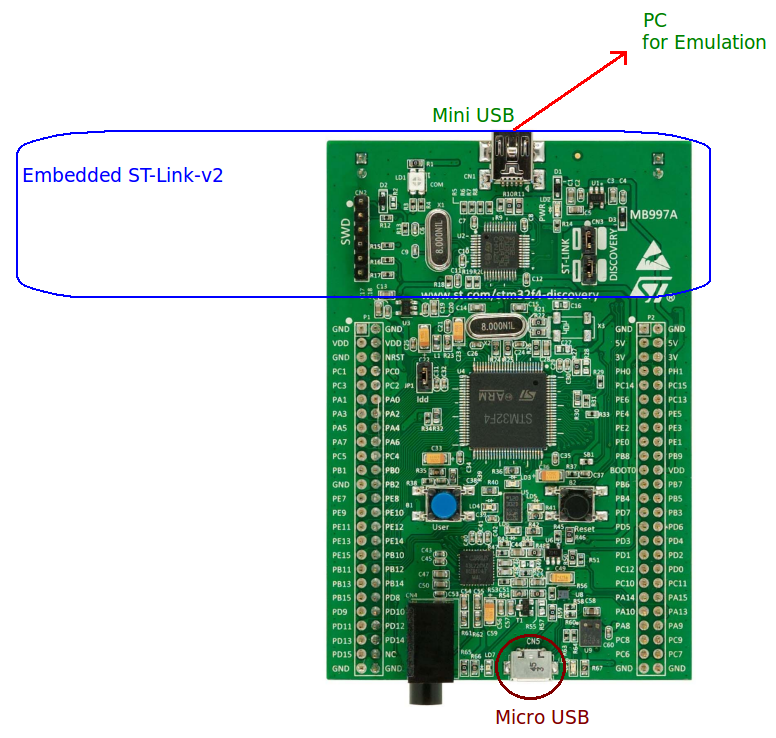
To use the MEMS_MOUSE emulation connect the STM32F4-Discovery MICRO USB to the PC.
Software
- For get this example (Ref. STM32F4-Discovery-EXE1) click here.
Explanation concerning how to use the file that download.
1) DownLoad the example
2) Request password to us for unzip it
3) After unzip you find a file named:
Ex1 - Demo_on_STM32F4-Discovery - solution.zip
do not unzip it but go on top and follow the explanation and where you see the name:
Exe1-HandsOn2011 replace it with Ex1 - Demo_on_STM32F4-Discovery - solution.zip
Extensive Presentation
- Click here for get a extensive presentation concerning this example.
- Click here for get a extensive presentation concerning this example in RUSSIAN language - thanks to the collaboration of: Александр Щитников